Instructions on how to complete a Car Album record
Instructions : Car Albums
- A selected photo of your car to introduce it
- A title for your Car Album
- Model of your XJS Soft Top, Engine Size, Year it was built
- Interior and exterior colours of your car (optional)
- A few sentences to describe your photo – “more is good”
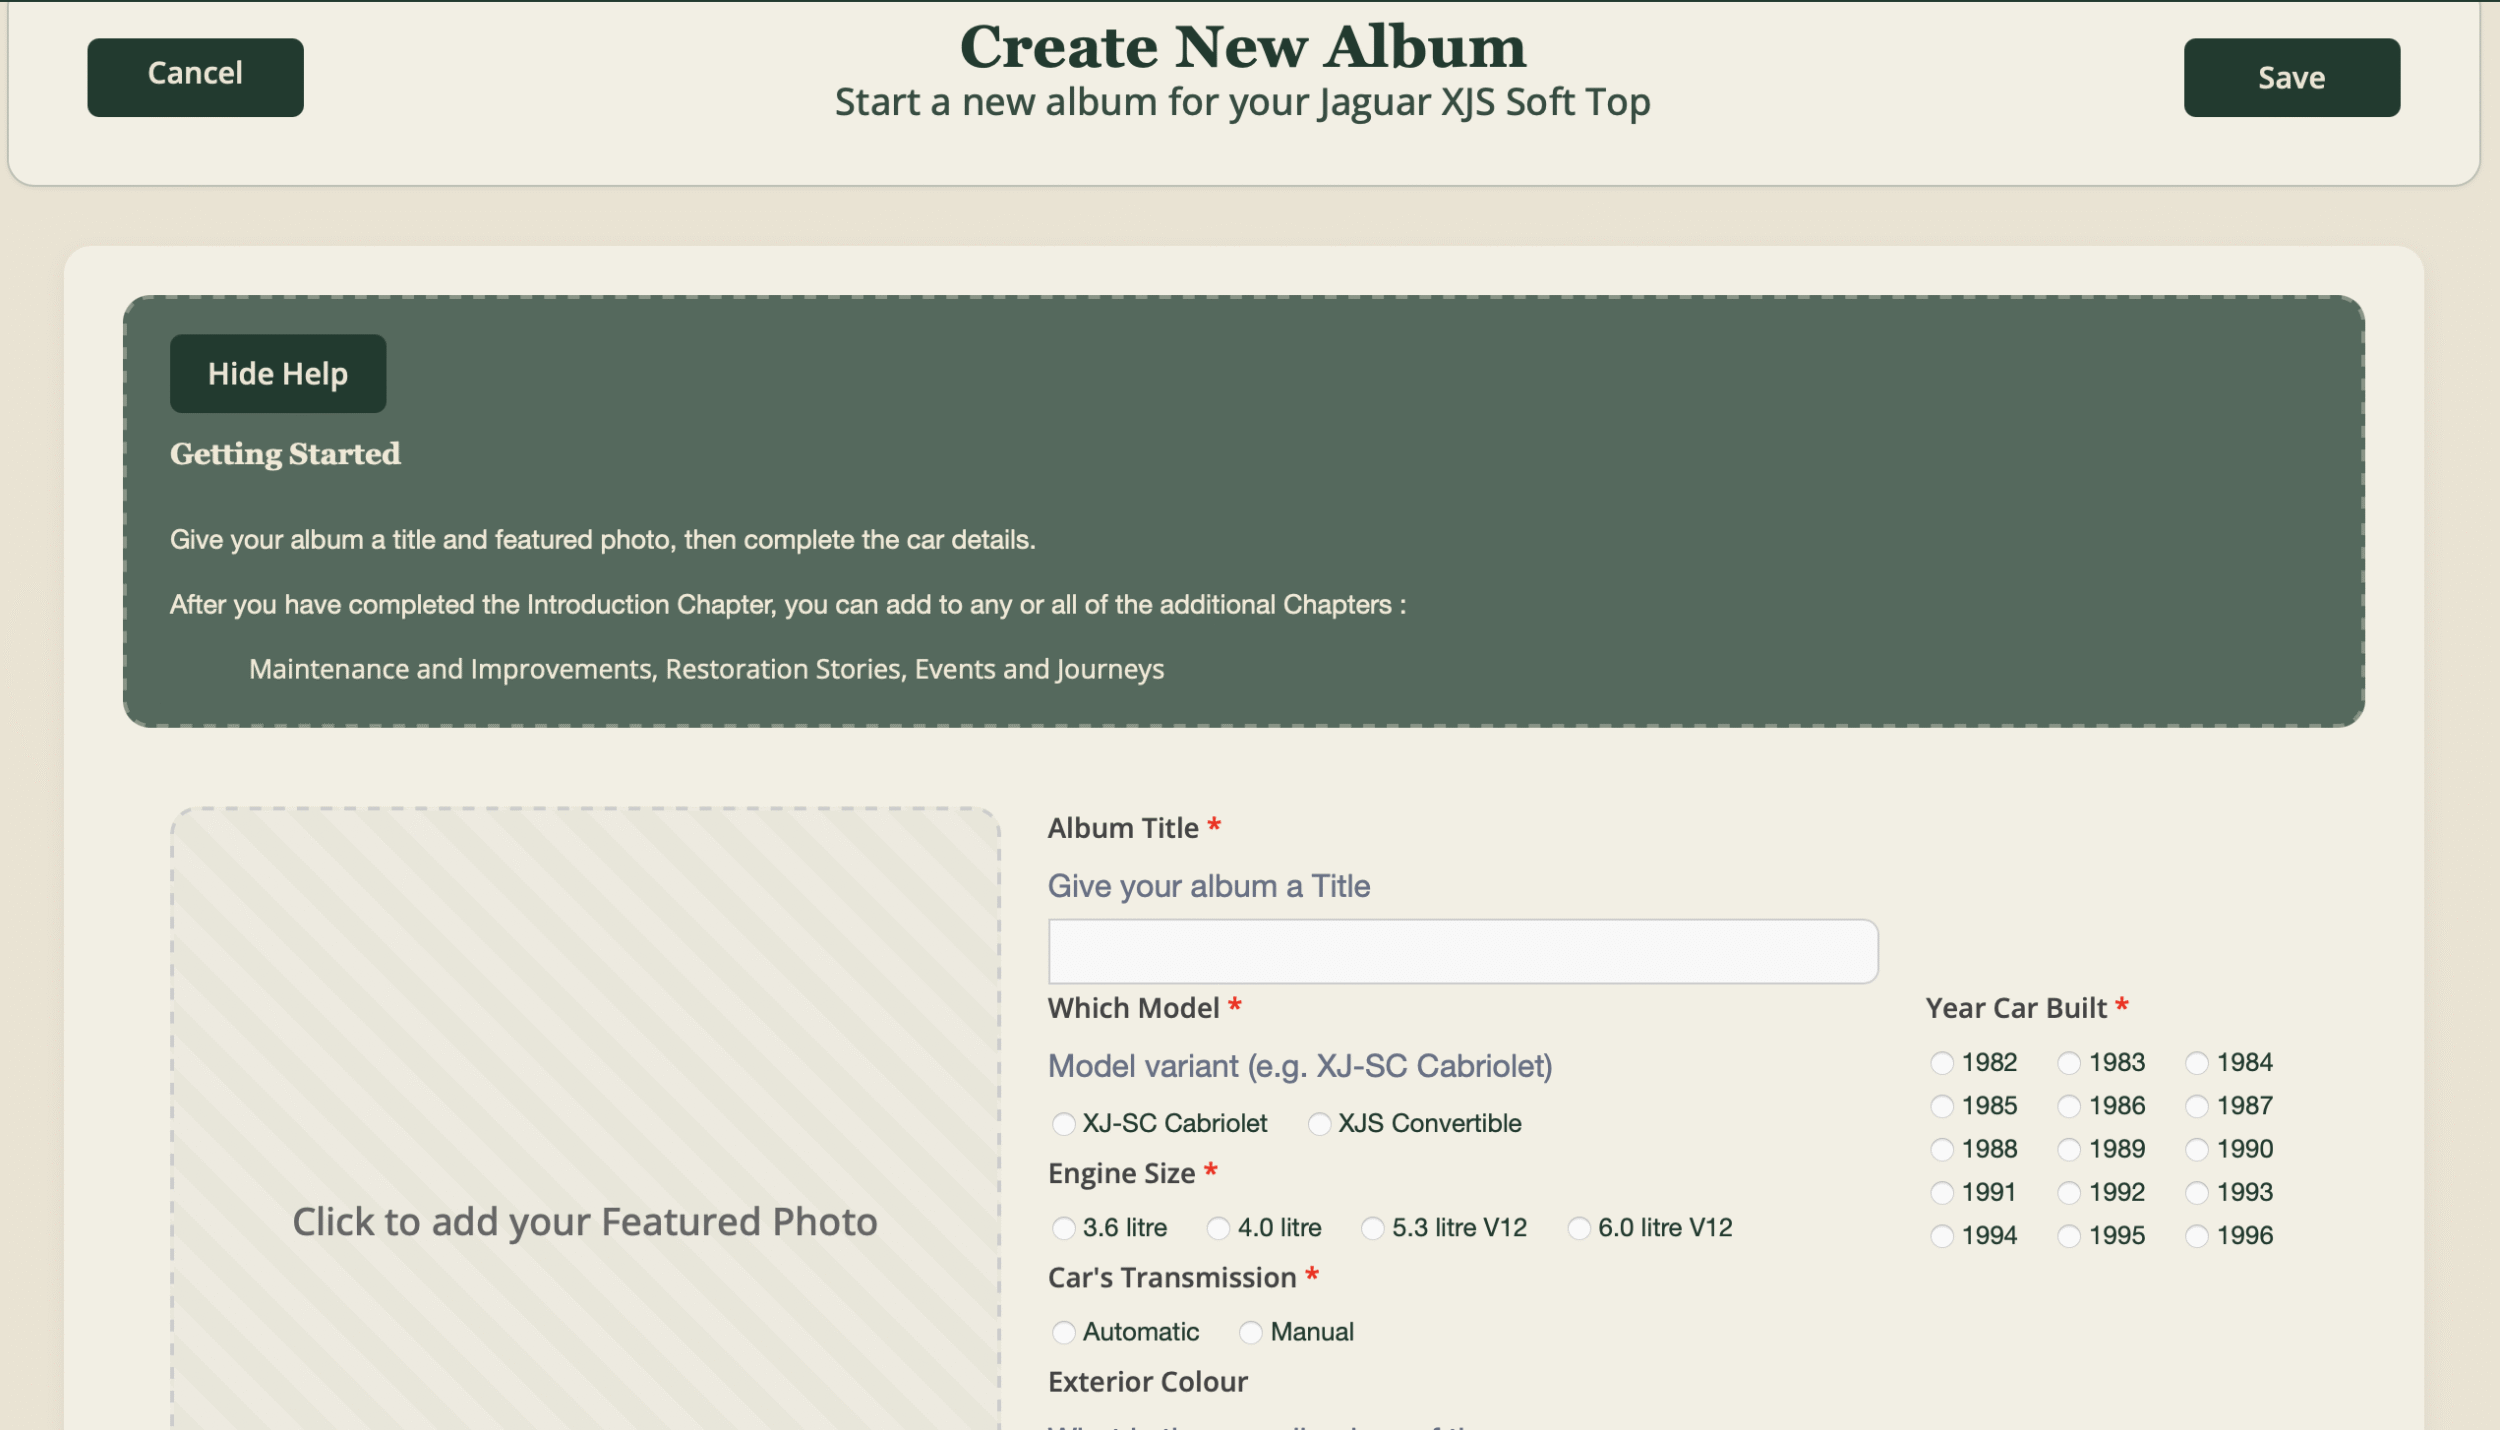
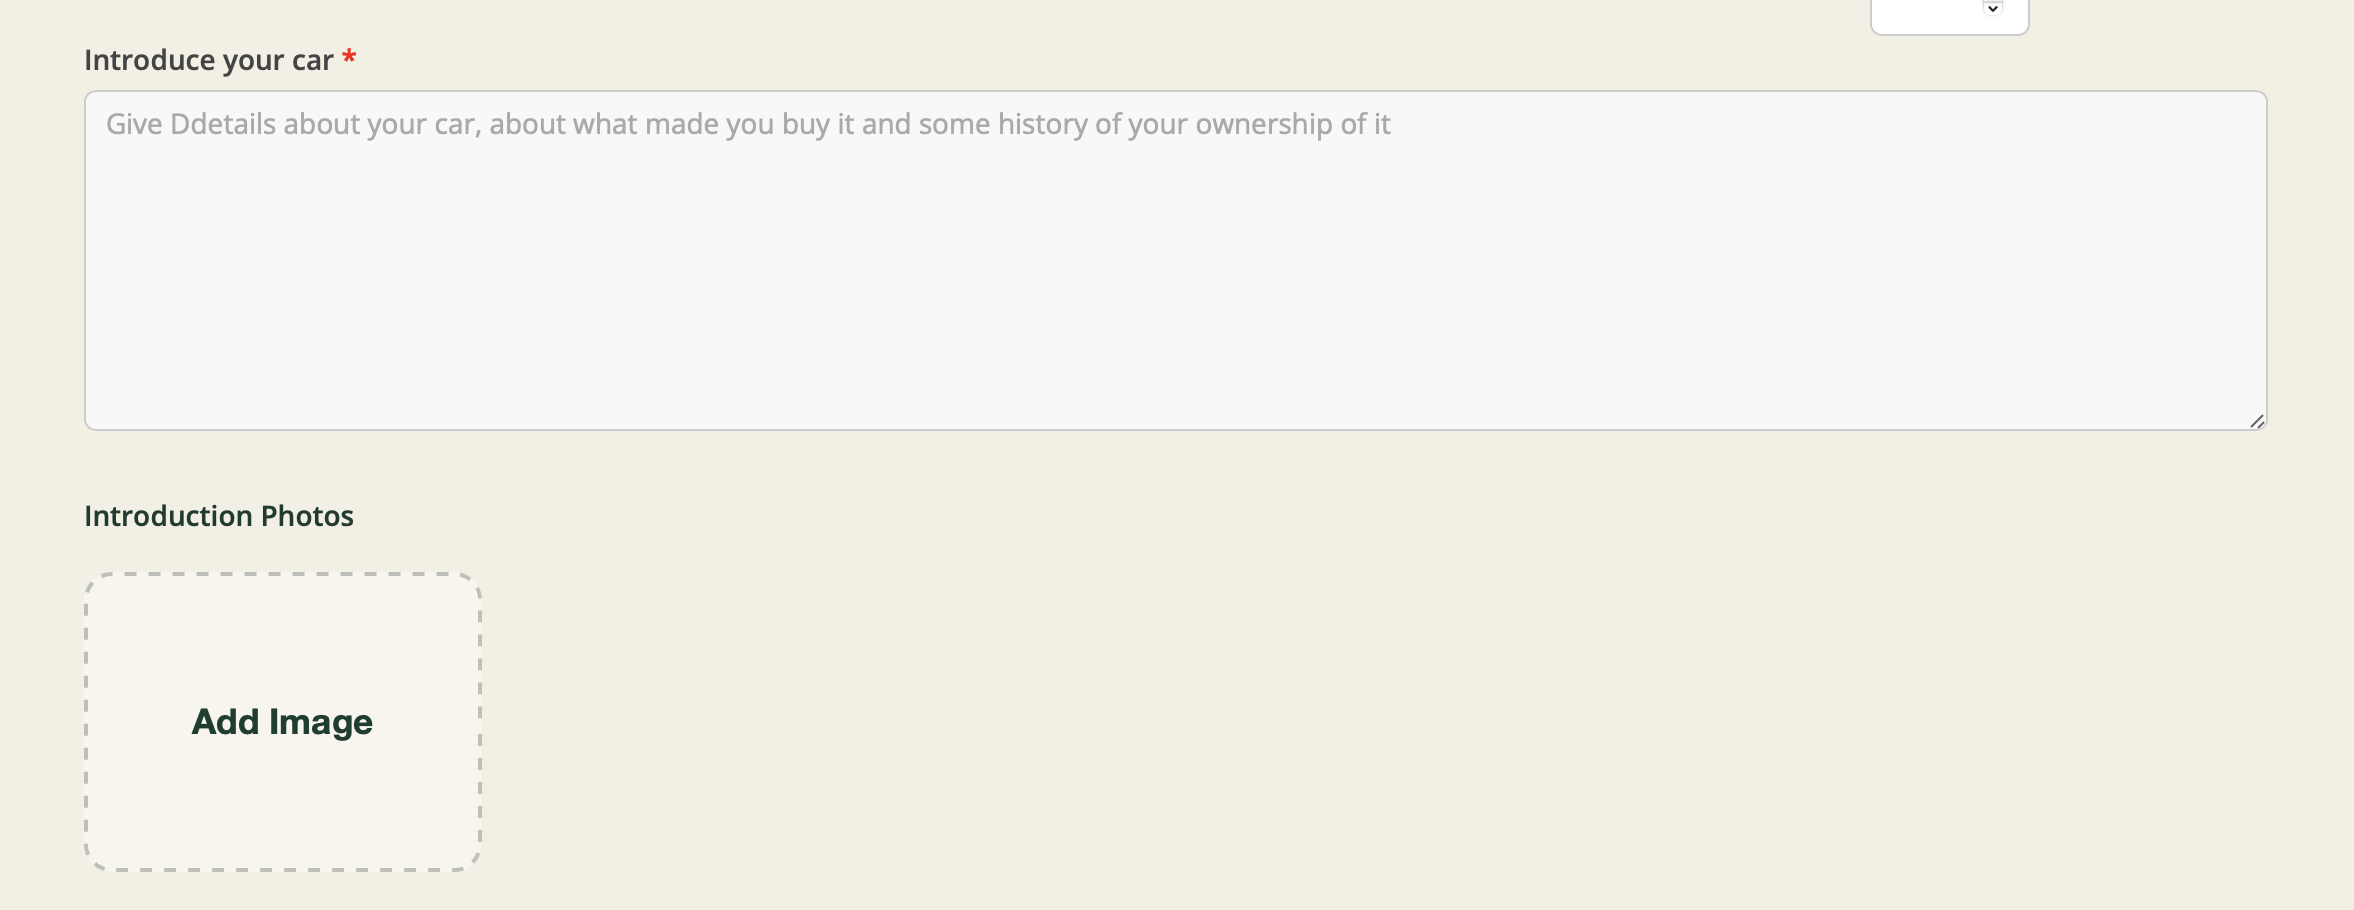
Once you have added your Featured Photo and completed the information fields it is time to scroll down the page and complete the Introduction.
This is where your Car Album starts to become more than just a record of techical information about what model it is etc etc. This is where can introduce your car in your own words to whoever is views your Car Album in the future, so you may want to say something about when and why you bought this car, how you found it when you first got it, and what the car is like now.
Stuck for what to write, not to worry – Just image yourself stood next to your car and someone comes up and says “Is this yours, had it long ?”. What would your reply be to that ??? That’s what you want to write down in this Introduction Section.
Feel free to write as much as you like about your car, as this will help to make it a more interesting read to others.
Then add a select few photos and add them, by way of further introducing your car
Once you’ve saved your Car Album, then it’s time to add stories, and you can do this in one or more of 3 individual Chapters.
Scroll down the page until you see this (as shown on the right)
This shows the 3 Album Chapters, represented as 3 separate cards side by side, one for each Chapter.
You cannot start writing your stories in a Chapter until the Introduction has been completed.
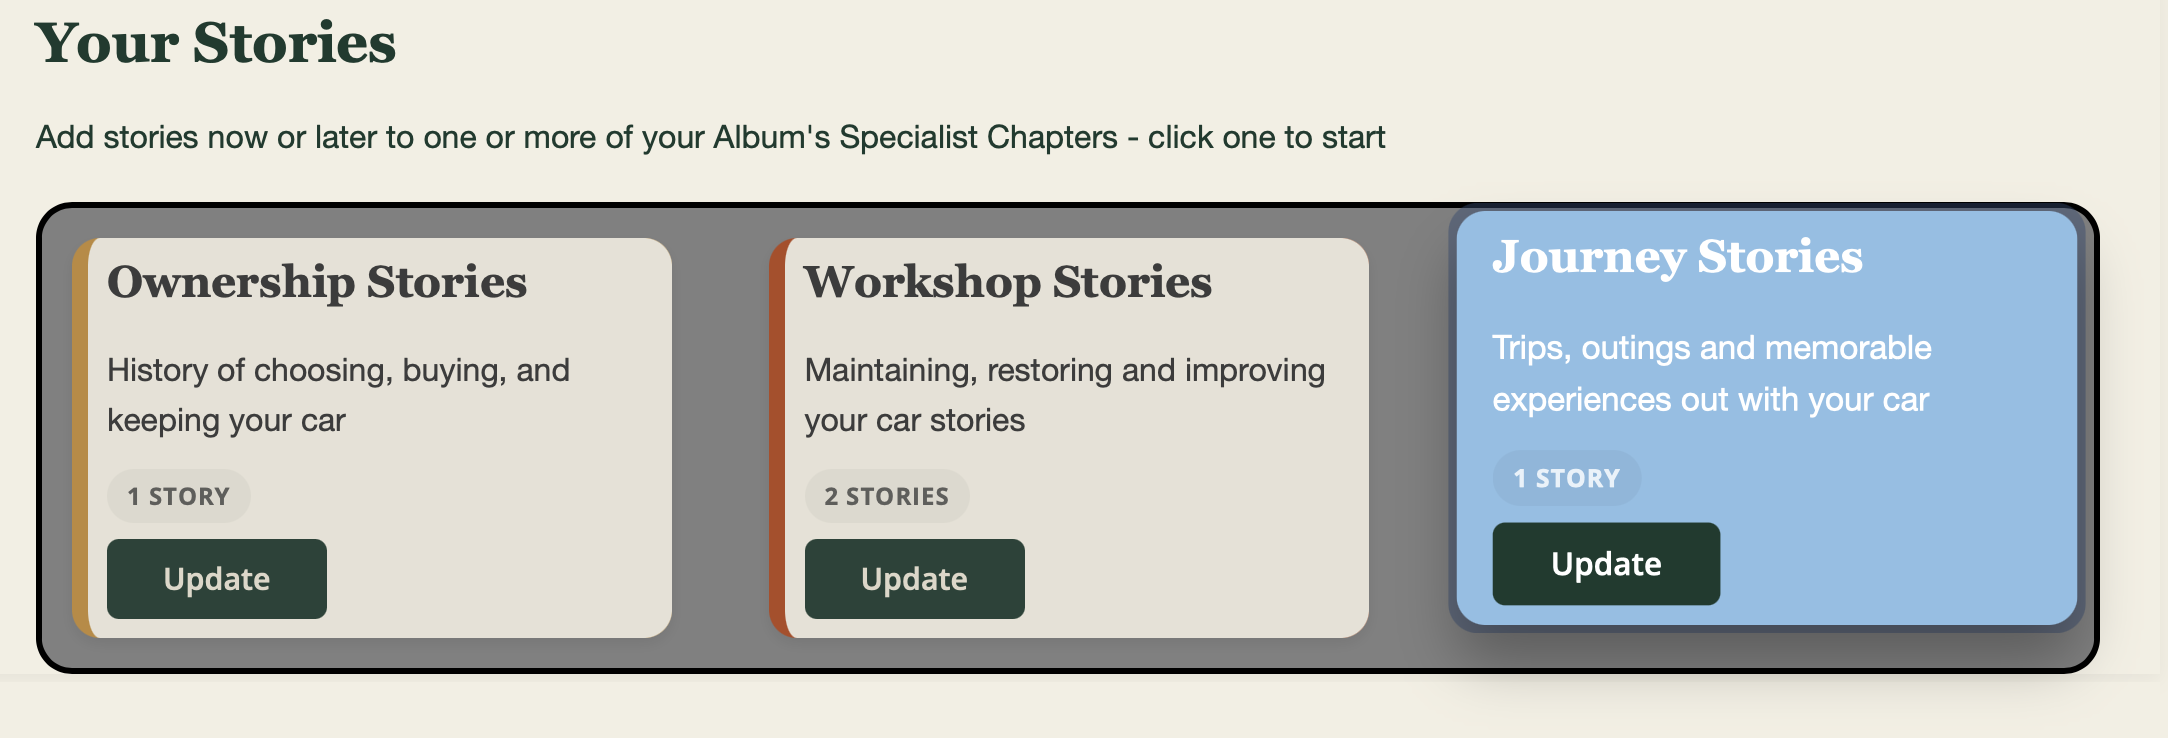
To start your first story, click on the Chapter’s card that you want your story to belong to, and the story section will appear below.
To change which Chapter you are working on, click a different Chapter’s card.
Remember : You can’t break anything by clicking these cards and switching back and forwards between Chapters – that’s what they’ve been designed to do 🙂
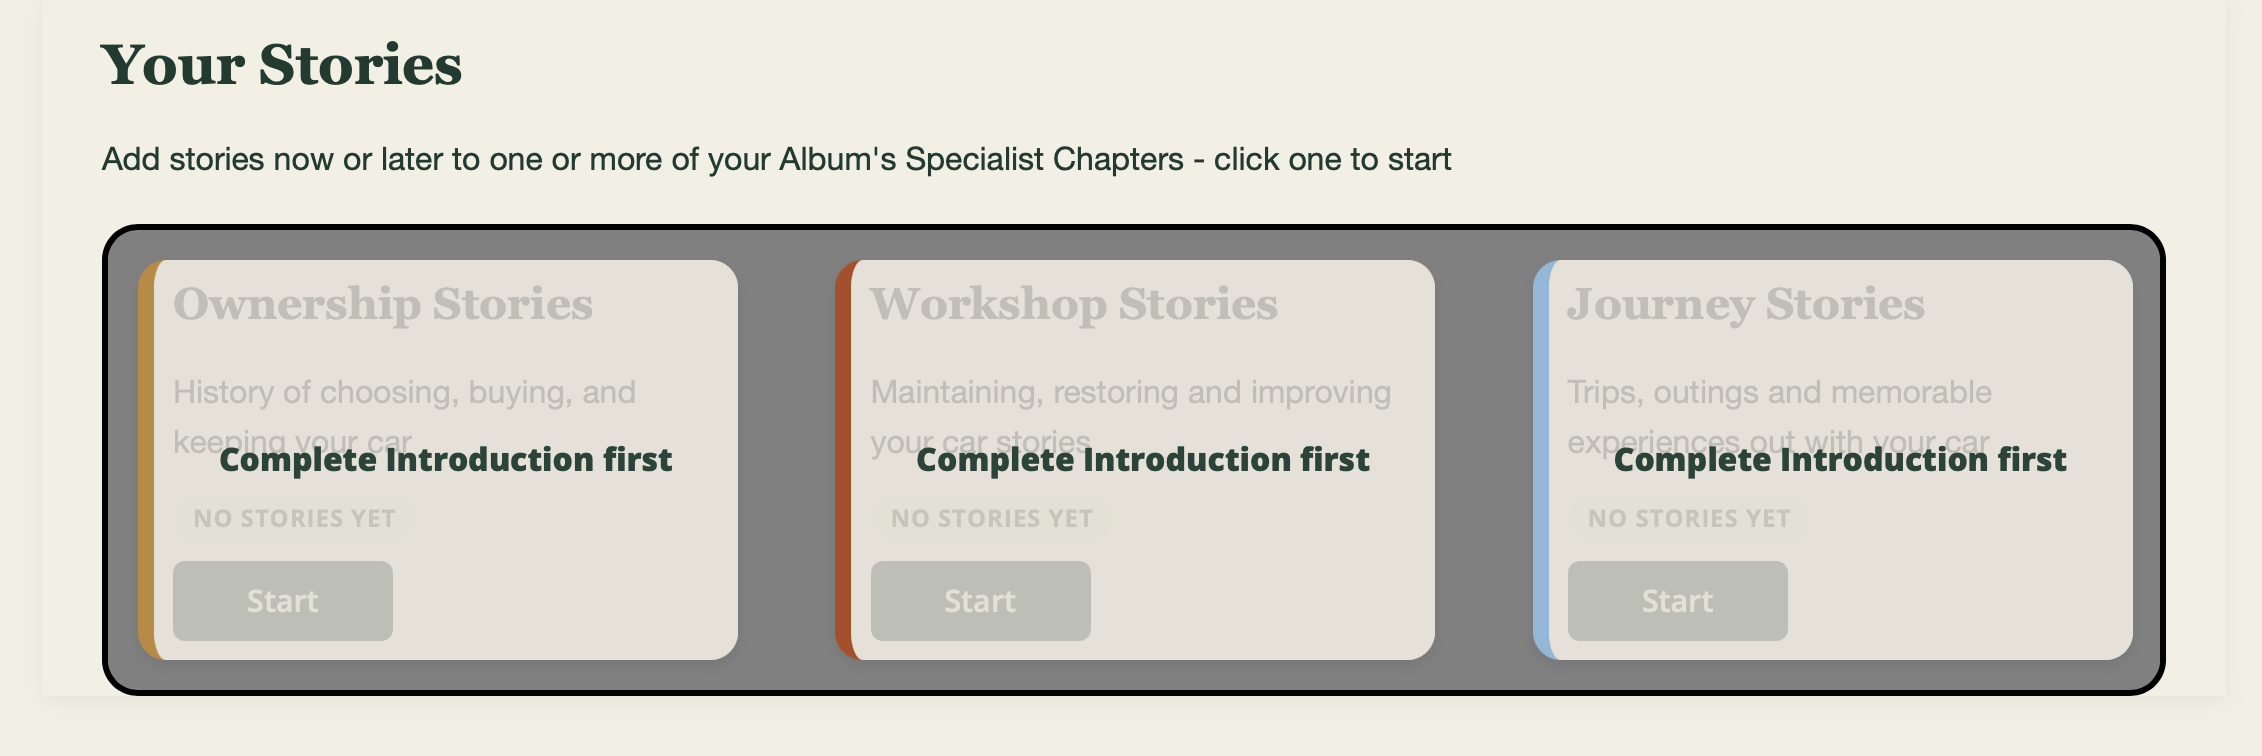
Once you’ve chosen which one of the 3 available Story Chapters (Ownership Stories, Workshop Stories and Journeys Stories) you will be ready to write your first story in your chosen Chapter. To help you they’re colour coded to help you identify them.
Your first story will be loaded up ready below the Chapter Section box, and consists of a text area where you can write your story, a Date field (optional), and just like the Introduction area you can add up to 10 photos that relate and support that story.
On the Left you will see preview of your current story, to remind you which story you are working on. Below the preview you will see all the other stories you have within that Story Chapter.
Remember : you don’t have to do everything at once. Your Car Album can be saved at any point and then you can return to it again, and again as and when time and inclination takes you.
When you are happy with the content of the story you have written, make sure you click the Save button so you don’t loose your work.
Remember : you can write more than one story per Story Chapter, so you don’t have to cram everything in on really long story.
Additional Stories – what does that mean > Do not worry, I will explain what it means and you can choose to do more if you want to. The Car Album Chapters can each be expanded by enabling you to add several different stories.
Just like in a book, your Car Album can have several Chapters and each Chapter can have several Stories.
Whenever you want to start a new story, click on the “Write another Story” card below your Preview on the Left. Your new story area will then appear in place of your current story.
- Switching Stories does not delete anything
- Think of it as if you are turning a page in a book, you can always turn back to the previous page
- Your previous story is still there and can be returned to at any time.
- You can’t break anything by clicking these cards and switching back and forwards between Chapters – that’s what they’ve been designed to do 🙂
- Remember : you have only “turned a page”, you haven’t lost the story you were working on, you have just started a new page in your Album’s Chapter
Now you can complete your new story, just like the previous story, with a title, date, text area and photo area. AT ANY TIME you can switch back to your previous story (or any other stories in this Story Chapter) by clicking on the mini card below the Preview on the left
After you have added a few stories to any or all of your Album’s Story Chapters, you will see that the Chapter Selection cards have been updated. You will see that each Story Chapter tells you how many stories have been created.
Remember : Save your Car Album as you go along, and then re-open it to carry on. That way you will avoid loosing what you have written if you close your computer down.
It is good idea to take a look at how your Car Album is taking shape (this is shown in full each time you save your Car Album) and may help you think of where you might want to add more to a story, or spur you on to add a new story to tell members about something else.